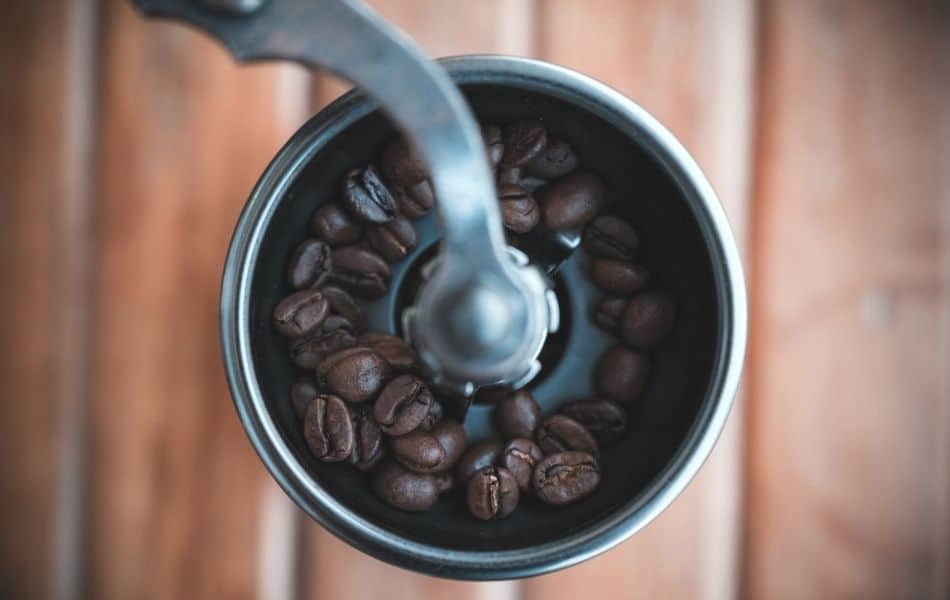
After buying my first manual coffee grinder I realized that it needed to be adjusted before I could achieve the correct grind density. So I did some research and discovered how to correctly adjust and calibrate manual coffee grinders.
For most manual coffee grinders, you remove the nut, grind handle and ring lock and then turn the adjusting ring. Turn the ring clockwise for a finer ground and counter-clockwise for a coarser ground. Other grinders are adjusted using a step-dial located on the bottom.
In addition to learning how to adjust my grinder, I discovered how important it is to put it in a zero position before adjusting to my grind setting. Read on to learn how to correctly adjust your manual grinder.
How to adjust the grind density on a manual grinder
Ring adjuster versus dial adjuster
Most manual coffee grinders are built with one of two grind adjustment mechanisms. The first mechanism involves removing the nut, handle and locking ring on the top of a grinder to access an adjustment ring.
The second type of mechanism involves attaching the grind handle and adjusting a step-dial located on the bottom of the grinder. Below are step-by-step instructions for each type of grinder.
How to know which type of grind adjuster your have
Dial adjusters are located on the bottom of the grinder while ring adjusters are located at the top. To determine what type you have, remove the coffee ground collector from the bottom and examine if your grinder has a dial with numbers.
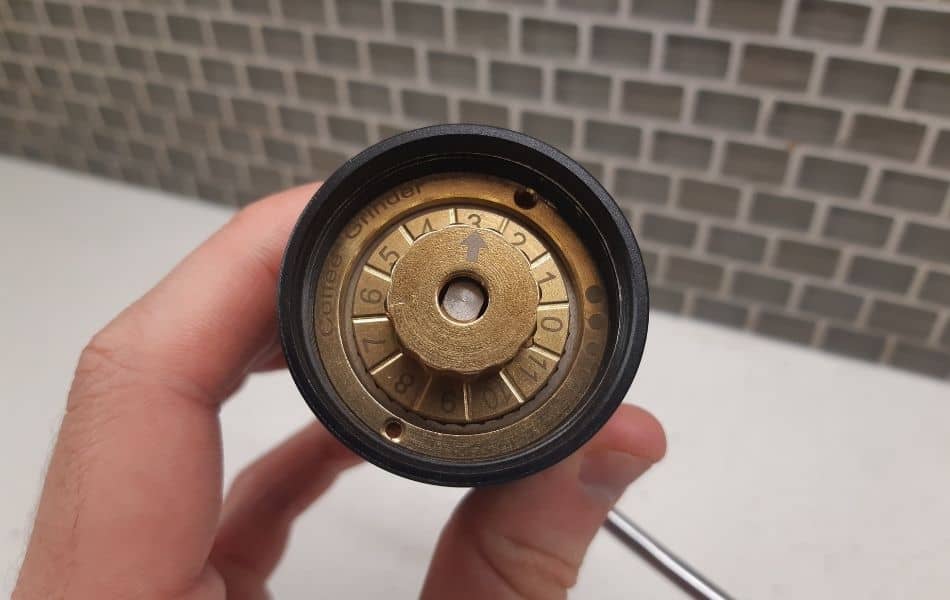
If it does, you have a dial adjuster. If it doesn’t then you have a ring adjuster.
How to change grind density with dial adjuster
Dial adjusters are often a little easier to adjust than ring adjusters. With your grind handle attached, simply turn your dial to change the grind density. Follow the steps below.
- Unscrew or detach the coffee grounds collector from the bottom to expose the grind dial.
- Attach and hold the handle to the top of the grinder, where it normally goes.
- Turn the step dial on the bottom of the grinder clockwise or counter-clockwise to adjust grind density.
Once you have set your grind density you are good to go. Simply reattach your ground collector and begin grinding your beans.
You may need to adjust your dial setting a few times until you find a density that is appropriate for the style of coffee you are brewing. I recommend writing down the dial number so you can adjust up or down in the future.
How to change grind density with ring adjuster
Ring adjusters must be disassembled to some extent to adjust the grind setting. Follow the instructions below to adjust your grind setting.
- Remove the top nut, handle and ring lock.
- Turn the adjustment ring clockwise or counter-clockwise to change the grind density.
- Replace the ring lock to secure the adjustment ring into place.
- Replace the grinder handle and nut.
Turn the ring or dial clockwise for a finer grind
Turning your adjustment ring or dial clockwise will produce a more finely ground coffee. What happens is the inner conical burr is being pulled closer to the fixed, outer burr. This creates a smaller gap between the two bur pieces, which causes the coffee beans to be ground more finely before they can fit through the gap in the bottom.
Turn the ring or dial counter-clockwise for a more coarse grind
Turning your adjustment ring or step-dial counter-clockwise will increase the space between grinding burrs, which will produce a more coarsely ground coffee.
How to calibrate a manual grinder to a “zero setting”
Learning how to calibrate your manual grinder to a “zero setting” is important for determining your desired grind density. Without zeroing out your grinder, you won’t be able to achieve an ideal grind density for your preferred style of coffee. This will cause you to brew a poor tasting coffee.
How to calibrate a ring adjuster grinder
First, remove the nut, grind handle and rick lock from the top of your grinder. Next, use your fingers to tighten the adjustment ring by turning it clockwise. Do not tighten it too tight. Just secure it until it is snug with your fingers.
This is your “zero position,” which means there is no gap between the two grinding burrs for any coffee grounds to exit. Once you have found your zero position, it might be helpful to take a permanent marker and draw a line on both your adjustment ring and the grind shaft so you can refer to its position when we make adjustments.
From here, you will turn your adjustment ring counter-clockwise to increase the space between burrs, which will produce a more coarsely ground bean. If your adjustment ring has notches in it, you can use them as increments to increase your grind size.
For example, you could start by turning the adjustment ring counter-clockwise by one notch and see how finely the coffee is ground. Continue increasing one notch at a time until you reach your desired grind density.
How to adjust a step-dial grinder
First, remove your coffee ground collector from the bottom and make sure your grind handle is attached to the top of your grinder. Next, while holding your grind handle securely in place, turn your grind dial clockwise until you can no longer turn it.
The dial on a new manual coffee grinder might be difficult to turn until you break it in. Once you reach a point where you can no longer turn your grinder dial clockwise, you are likely at position zero.
To verify, hold your grinder horizontally and face the end with the grind handle towards you. From here, turn the grind handle clockwise until it’s in the 9 o’clock position (also horizontal to the ground) and release.
If the handle remains in place at the 9 o’clock position then your grinder has successfully been set to the zero position. If the handle falls with gravity, then you’re not quite there. Continue adjusting the step-dial clockwise, one number at a time, until the grind handle no longer falls.
How the burr adjustment works
A manual grinder has two components: the outer burr and the inner burr. The outer burr is fixed in position to the outer edge of the grinder, while the inner conical burr is attached to an adjustable and rotating grind shaft.
The shaft and inner burr are pushed through the center of the outer burr until the inner burr fits nicely inside the outer burr. From here, the grind shaft is rotated clockwise or counter-clockwise to adjust how far apart the two burrs are from each other.
The closer the burrs are, the finer the grind will be. The further they are, the more coarse the grind will be.
When to replace your manual coffee grinder
Replace your manual grinder burrs about once every 2.5 years to maintain a consistent grind density. Many people start experiencing uneven grinds after grinding 75-100 pounds of coffee. You will reach 100 pounds after 133 weeks if you grind one bag of coffee per week.
The life expectancy of your manual grinder will depend on the types of beans you grind the grind volume. Lighter roast beans will typically wear down your burr grinder more quickly due to a harder density.
When your grounds are inconsistent
The main sign of burr wear is an inconsistent grind. Look closely at your ground coffee and examine whether or not the grind has a uniform size. If you notice a mix of large and small pieces then it might be time to consider replacing your burrs or buying a new grinder altogether.
How to prolong burr life
Prolong the life of a manual grinder burrs by cleaning it regularly, grinding in an upright position and only using it to grind coffee beans. Unevenly ground coffee beans can be a consequence of not caring for your grinder.
Clean them regularly
It’s best practice to clean your burr grinder frequently with a soft brush to remove leftover coffee grounds. It’s also useful to occasionally disassemble your grinder and deep clean the burrs. This prevents oils from sticking to the burrs and causing grounds to stick.
Only use it to grind coffee
Most coffee grinders are designed and tested only for grinding coffee beans. Grinding nuts and other materials can increase wear on our burrs due to them having a different hardness
Grind in an upright position
Try to grind in an upright position to prevent putting uneven pressure on your grinding shaft. Grinding at an angle can cause the burrs to wear out unevenly and produce an uneven grind well before they reach their typical life expectancy.
